Best Bibs for Heavy Droolers

SO. MUCH. DROOL.

Our boys drool a lot and while some have undergone more drastic measures (such as clipping the salivary glands or using Botox to paralyze them) to curb this issue, depending on the severity, most of us just rely on good bibs. Everyone has their own preference but I’ve come to love bandanna-style bibs made out of sweatshirt material. They absorb a fair amount and keep my guy looking looking like the stud he is.

Here are some of my favorite brands:

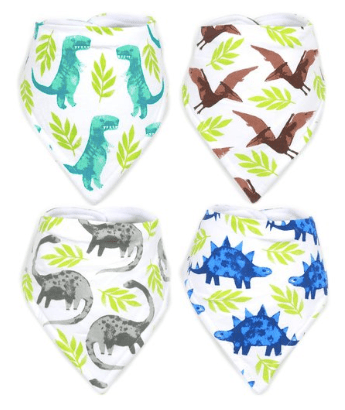
  • Stadela – $15 for a 4-pack and some of the best designs I’ve seen on bandanna bibs. Available on Amazon (where you can sometimes find an 8-pack for $17).

Screen Shot 2019-02-28 at 12.00.22 PM

  • KiddyStar – Larger format bibs to catch more drool. $22 for 5 as of time of writing. Current favorites. Buy here on Amazon.
    Screenshot 2024-01-03 at 3.28.52 PM
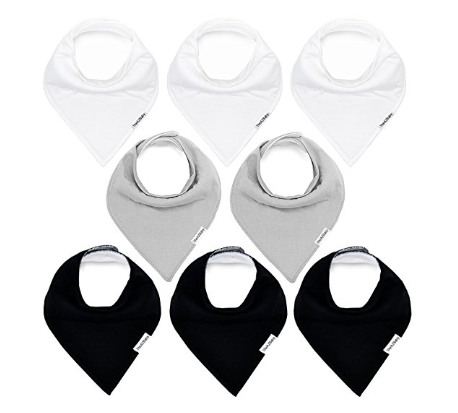
  • TheAZBaby – Currently unavailable but hopefully back in stock soon.
    $16 for a set of 8 on Amazon. Love solid colors so stains are easier to hide (especially on the black). A similar brand is Kea Babies on Amazon.

Screen Shot 2019-02-28 at 12.02.59 PM

  • Bibble Plus Dignity Bibs – This UK company makes bibs specifically for older kids & adults. I love the name “dignity bibs.” The price depends on the size you buy.
  • SeenIn Bibs – Another UK company they have a lot of great options for kerchief bibs (including some with rubber tips for chewing, and a 2-in-1 option so you can easily flip it when one side gets too wet, without changing the bib entirely).

And finally, I have to give a shout out to my local Once Upon a Child store as I was there looking for a Halloween costume one day and they had a huge bin of sweatshirt bibs (all brand new) with no labels, sold for $1.50/each so I did a huge stock up which allowed me to get rid of all the embarrassingly stained bibs I’d been holding onto.

Have a great bib brand you love? Let me know!  Email allaboutatrx@gmail.com

Sensory Brushing & Joint Compressions

The first exercises we were taught to do with Ryan at home every day were joint compressions and sensory brushing. The first time I saw sensory brushing anywhere else was in the (terribly depressing) movie Tully with Charlize Theron and that’s when I realized it was a thing other people maybe did too. Read more below about sensory brushing and joint compressions. It’s easy to incorporate into your daily routine.

Here’s a video I found on YouTube that shows both, though we used a different brushing technique. (She looks angry but she’s not.)

Sensory Brushing:
Many kiddos with neurological disorders issues have overly sensitive or defensive reaction to touch. Even though we’ve been doing this for 3 years, I just found out there’s an official name for “sensory brushing.” It’s called Wilbarger Protocol for Sensory Integration, or brushing therapy for short. It requires having a plastic surgical brush like this (a surgeon friend gave us a few from his hospital, for free), and brushing your child’s body wherever they are most sensitive. For our kiddo, we would brush his hands and arms every morning in long strokes. His therapist would do his entire upper torso. And in the video above, you see some people do the entire body. This is meant to deliver strong sensory input and teach the child’s boy to self-regulate this input.

Joint Compressions:
These are designed to send proprioceptive information to the brain, helping the body understand its place in space and where certain joints are within the body without visual cues. Proprioception is what allows you to touch your finger to your nose with your eyes closed. You understand where your body parts are. This isn’t necessarily the case in people with neurological disorders. The ability to understand where limbs and body parts are is disrupted because the signals that send the stimuli to the brain do not fire correctly. So repeated joint compressions daily may help the body understand where certain body parts exist and may help the individual learn to move his body independently one day.

Doesn’t hurt to try, right?

PS – I also thought this was an interesting take on “brushing” from a blog run by an “anonymous OT.”

Screen Shot 2019-05-18 at 10.23.50 PM

*Please keep in mind I am not a medical expert or trained therapist of any kind. Just a mom who worries too much and reads too much and always thinks she isn’t doing enough. But figures she should share some of what she learns.


Tummy Massage

One of our therapists recommended trying the I Love You massage on Ryan when he’s constipated or otherwise has an upset stomach. This massage tries to help move the bowels along manually by gently pushing along the stomach in a clockwise motion, by making an “I” then an “L” then a “U.”

I sing along to the tune of “Skidamarink” but that’s just my thing. I also use the TummyGize essential oil when I do this, to help soothe the stomach. (While my personal verdict is still out on essential oils, my overall feeling is that it can’t hurt if they’re used properly.)

This video shows the technique in a nice, visual way but you can find many other videos online if you need more help.

Free All-Access Pass to National Parks!

Individuals with disabilities are given access to a FREE lifetime pass to our beautiful National Parks system. It’s called an Access Pass and it’s a great thing to apply for immediately because you never know when it might go away. The disabled individual gains free access to National Parks and often discounts on amenities within these parks (tours, camp sites, boat launches, etc). You can read all about the Access Pass Benefits here.

To qualify, the person must have a diagnosed permanent disability. How do you get this pass? There are a few ways. You can go to a participating location and apply for it in person. National Parks passes are sold at most national parks but if the park does not have a fee, this may not be available so be sure you check before going.

You can also apply via mail (but know that it’s not a quick turnaround, if you’re planning to go to a park tomorrow). To get this pass by mail, you must submit an application, proof of residency and proof of permanent disability plus pay the processing fee of $10.

Be sure you have the correct paperwork available whichever way you are applying. A physician’s note or SSDI paperwork should suffice.

ALSO: did you know every 4th grader gets free access to our National Parks system? This is the Every Kid in a Park initiative from President Obama and you can read more about it here. 

IKEA Furniture Modifications for Disabilities

IKEA Israel teamed up with a design firm to create some add-on modifications for their furniture. The website shares downloadable instructions so you can print these modifications on a 3D printer for your home (if you can find access to a printer…perhaps a local university or design firm would be willing to share theirs).

Screen Shot 2019-03-18 at 10.18.17 AM

The Mega Switch attaches to a lamp and gives you a much larger area for turning a lamp on and off vs the standard small switch which requires a fair amount of independent finger dexterity.

You can view all the modifications and download the designs here.